> For the complete documentation index, see [llms.txt](https://docs.parheliabio.com/llms.txt). Markdown versions of documentation pages are available by appending `.md` to page URLs; this page is available as [Markdown](https://docs.parheliabio.com/product-guides/automation-opentrons-ot-2-setup.md).
# Automation (Opentrons OT-2) Setup
This page goes through setting up a new Opentrons OT-2, most of the content is in links to Opentrons website and Opentrons videos.
{% hint style="info" %}
This is for automation bundles only, click here for manual operation:[Manual Operation and "Blue Dye Demo" Manual Protocol](/product-guides/manual-operation-and-blue-dye-demo-manual-protocol.md)
{% endhint %}
{% hint style="info" %}
#### If you want to get a head start, download our GitHub archive from [here](https://github.com/parheliabio/ot2-scripts/archive/refs/heads/main.zip)!
{% endhint %}
## Opentrons OT-2 Robot and Software setup
{% embed url="" %}
^ Click here ^ For Opentrons Set up
{% endembed %}
The Opentrons Help Center at is a fantastic resource that has s[tep-by-step guides](https://support.opentrons.com/s/article/Get-started-Unbox-the-OT-2) as well as [**video guides**](https://support.opentrons.com/s/article/Get-started-Unbox-the-OT-2) **(which we strongly recommend) like this video series below** that takes you from box to protocol.
{% embed url="" %}
^ This playlist covers ^
1. [Unboxing the OT-2](https://youtu.be/nvjNHod-2hU)
2. [Unlocking the OT-2](https://youtu.be/c2fnzlFfCSE)
3. [Setting up the Opentrons App](https://youtu.be/sqkvy8xdPVw)
4. [Attaching Pipettes to the OT-2](https://youtu.be/xmCItodWx2o)
5. [Deck Calibration on the OT-2](https://youtu.be/bKYmFyJACaU)
6. [Tip Length & Pipette Offset Calibration on the OT-2 ](https://youtu.be/7mMtvdcV-dM)
7. [Running a Protocol on the OT-2](https://youtu.be/hiN0EOW3vHM)
{% hint style="info" %}
The Deck Calibration process in video 5 of jogging the pipette tip in the XYZ directions into the center of the engraved "+" symbol on the Opentrons deck is very similar to the labware calibration for the Omni-Stainer™ which is performed using the embossed "+" symbol on the C12 or S12 Omni-Stainer™ lid.\
[As in this video ](https://vimeo.com/779408843)
{% endhint %}
{% hint style="success" %}
Our engaging virtual demonstration serves as an excellent introductory guide for understanding the steps in operating the Parhelia Bio Omni-Stainer C12 and S12, encompassing both manual and automated usage, along with thermal sheath and thermal modules. [**View the virtual demo here!**](https://parheliabio.com/view-virtual-demo/?utm_source=gitbook\&utm_medium=gitbook)
{% endhint %}
## Checklist
* [ ] Set up Opentrons OT-2 robot. [This set-up guide is a great reference](https://support.opentrons.com/s/ot2-get-started), and our friends at Opentrons are happy to assist you with this if you have any [questions](https://support.opentrons.com/s/information-about-opentrons-support).
* [ ] [Download Opentrons App](https://opentrons.com/ot-app/)
* [ ] [Download Parhelia Bio's base OT-2 scripts and labware definitions from GitHub by clicking here](https://github.com/parheliabio/ot2-scripts/archive/refs/heads/main.zip)
* [ ] If you would prefer to visit the GitHub and download individual files our GitHub is at
* [ ] Download customized or stock Omni-stainer script from [Stainworks](https://3qcwn6iy48.execute-api.us-east-1.amazonaws.com/)
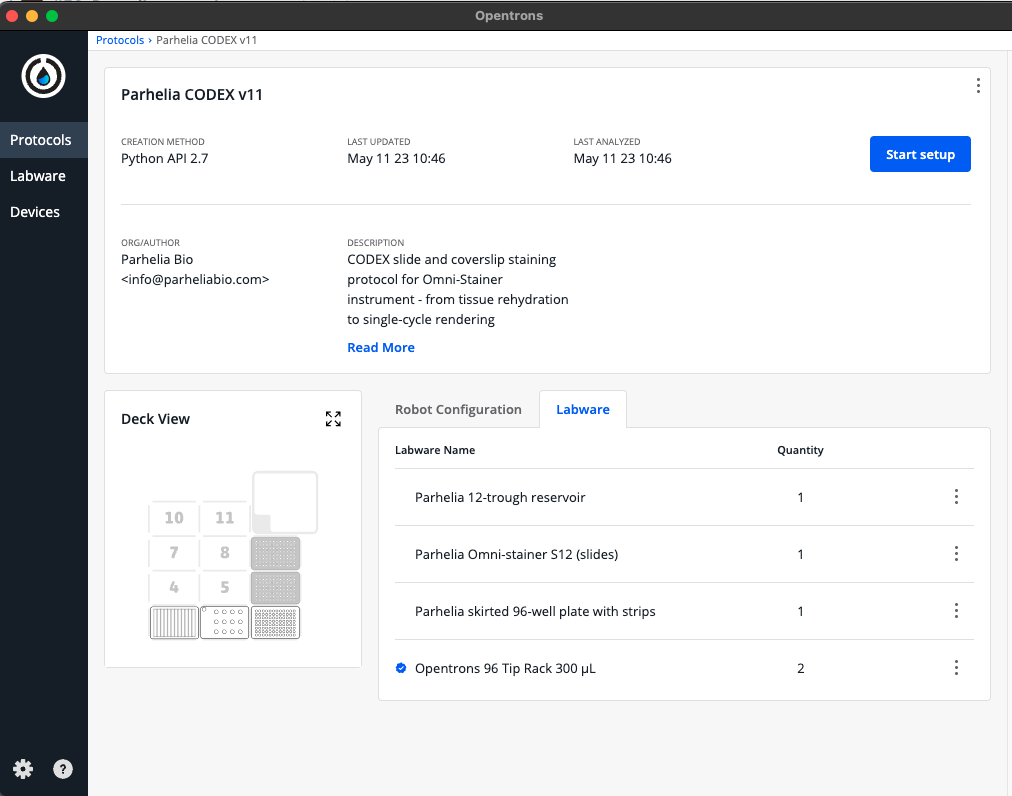
* [ ] Load protocols and labware definitions into Opentrons software
* [ ] Follow protocol-specific instructions, for preparing and loading your labware and doing protocol setup. We strongly recommend starting with the Blue Dye Demo protocol to get comfortable using the device before conducting actual experiments.
Example of staining protocol loaded into Opentrons